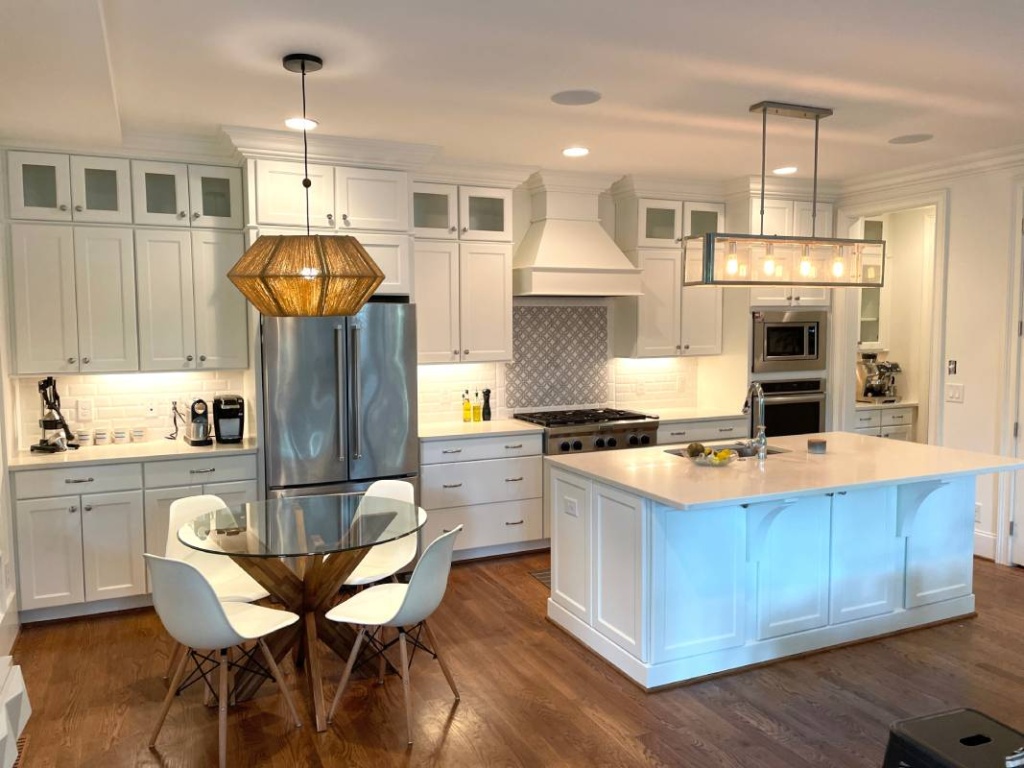
If you’re looking to revamp your kitchen without breaking the bank, cabinet refinishing could be the perfect solution. By giving your cabinets a fresh new look, you can transform the entire appearance of your kitchen. Let’s explore the power of cabinet refinishing and the benefits it offers.
The Power of Cabinet Refinishing
Cabinet refinishing is a cost-effective way to update the look of your kitchen cabinets. Instead of replacing your cabinets entirely, refinishing allows you to breathe new life into your existing cabinets. This process involves removing the old finish, prepping the surfaces, and applying a new paint or stain.
With the right techniques and materials, cabinet refinishing can completely transform the appearance of your kitchen. You can choose from a wide range of colors and finishes to match your style and create a fresh, modern, or even classic look. Whether you prefer a sleek and contemporary vibe or a warm and traditional feel, cabinet refinishing provides the flexibility to achieve your desired aesthetic.
Benefits of Refinishing Cabinets
Refinishing your cabinets offers several benefits beyond just a fresh new look. Let’s explore some of the advantages of choosing cabinet refinishing over other options:
- Cost-effective: Cabinet refinishing is significantly more budget-friendly compared to replacing your cabinets entirely. It allows you to achieve a beautiful transformation at a fraction of the cost.
- Time-saving: Refinishing cabinets is a quicker process compared to a full cabinet replacement. Instead of enduring a lengthy renovation, cabinet refinishing can be completed within a matter of days, minimizing disruption to your daily life.
- Eco-friendly: By refinishing your cabinets instead of replacing them, you contribute to a more sustainable approach. Refinishing reduces waste by reusing existing materials and avoids the environmental impact of manufacturing and disposing of new cabinets.
- Customization: Cabinet refinishing provides the opportunity to customize your kitchen according to your personal preferences. You can choose from a variety of colors, finishes, and techniques to create a unique and personalized look.
By embracing the power of cabinet refinishing, you can give your kitchen a fresh new look while enjoying the numerous benefits it offers. Whether you’re aiming for a complete kitchen makeover or simply want to update the cabinets, refinishing is a versatile and cost-effective solution. To explore different cabinet painting ideas and colors, visit our article on cabinet painting ideas.
In the next sections, we will delve into the step-by-step process of preparing and refinishing your cabinets to achieve the best results. Stay tuned to learn more about the techniques, materials, and tips for a successful cabinet refinishing project.
Preparing Your Cabinets
Before diving into the cabinet refinishing process, it’s crucial to prepare your cabinets properly. This ensures that the refinishing job is smooth and successful. In this section, we will cover three important steps: assessing the condition of your cabinets, gathering the necessary tools and materials, and removing cabinet hardware and cleaning surfaces.
Assessing the Condition of Your Cabinets
Begin by carefully inspecting the condition of your cabinets. Look for any signs of damage, such as cracks, dents, or loose hinges. Take note of any necessary repairs that need to be addressed before refinishing. This includes filling in holes, tightening screws, or replacing damaged parts. Assessing the condition of your cabinets helps you plan for the appropriate refinishing techniques and materials.
Gathering the Necessary Tools and Materials
To successfully refinish your cabinets, gather the following tools and materials:
| Tools | Materials |
| Screwdriver | Drop cloths or plastic sheeting |
| Putty knife | Painter’s tape |
| Sandpaper (various grits) | Cleaning solution or mild detergent |
| Tack cloth or lint-free cloth | Bucket of water |
| Paintbrushes and/or paint sprayer | Gloves |
| Paint roller and tray (if applicable) | Protective eyewear |
| Dust mask |
Having these tools and materials ready before starting the refinishing process will make the job more efficient and ensure that you have everything you need at hand.
Removing Cabinet Hardware and Cleaning Surfaces
Before refinishing, it’s important to remove all cabinet hardware, including knobs, handles, and hinges. This allows for easier access to the surfaces and ensures a clean and even finish. Keep the hardware organized and labeled to make reinstallation easier later on.
Once the hardware is removed, thoroughly clean the cabinet surfaces. Use a cleaning solution or mild detergent mixed with water to remove grease, grime, and any residue. Wipe down the surfaces with a lint-free cloth or sponge, ensuring they are dry and free of any debris before proceeding.
By assessing the condition of your cabinets, gathering the necessary tools and materials, and properly cleaning the surfaces, you set the stage for a successful cabinet refinishing project. In the next section, we will delve into various refinishing techniques, including sanding, priming, and applying the paint or stain.
Refinishing Techniques
To achieve a stunning transformation for your kitchen cabinets, proper refinishing techniques are crucial. This section will guide you through the essential steps of sanding and prepping the cabinets, priming them, and applying the paint or stain to achieve a professional-looking finish.
Sanding and Prepping the Cabinets
Before you begin the refinishing process, it’s important to thoroughly sand and prep the cabinets. This step ensures that the surface is smooth and free from imperfections, allowing for optimal paint or stain adhesion.
Here’s a step-by-step guide to sanding and prepping your cabinets:
- Start by removing all cabinet doors, drawers, and hardware. This will make the sanding process easier and allow for better access to all surfaces.
- Use a medium-grit sandpaper (such as 120-grit) to sand the cabinet surfaces. Sand in the direction of the wood grain, applying even pressure. This helps to remove any existing finish, roughen the surface, and create a better bonding surface for the paint or stain.
- After sanding, switch to a fine-grit sandpaper (such as 220-grit) and sand again to smooth out any roughness or visible sanding marks.
- Once the sanding is complete, remove any dust or debris by thoroughly cleaning the cabinets with a damp cloth or vacuum cleaner. This ensures a clean surface for the next steps.
Priming the Cabinets
Priming is a crucial step in the refinishing process, as it helps to seal the surface, promote better adhesion of the paint or stain, and provide a consistent base color.
Follow these steps to prime your cabinets effectively:
- Choose a high-quality primer suitable for your cabinet material and the type of paint or stain you’ll be using. Consider using a primer specifically designed for cabinets to ensure optimal results.
- Apply the primer evenly to the cabinet surfaces using a brush or roller. Make sure to cover all areas, including the front, back, and edges of the cabinet doors and drawers.
- Allow the primer to dry completely according to the manufacturer’s instructions. This typically takes a few hours, but it’s recommended to wait overnight for the best results.
Applying the Paint or Stain
The final step in the refinishing process is applying the paint or stain to achieve the desired look for your cabinets. Whether you choose to paint or stain your cabinets depends on your personal preference and the style you want to achieve.
Follow these guidelines for applying paint or stain to your cabinets:
- Select a high-quality paint or stain suitable for your cabinet material. Consider factors such as durability, ease of application, and the finish you desire.
- Apply the paint or stain evenly using a brush or sprayer, following the manufacturer’s instructions. Apply multiple thin coats rather than one thick coat to achieve a smooth and professional finish.
- Allow each coat to dry completely before applying the next one, ensuring that you follow the recommended drying time provided by the manufacturer.
- Once all coats have been applied and the cabinets are completely dry, you can reassemble the cabinets, reinstall the hardware, and enjoy your beautifully refinished kitchen cabinets.
By following these refinishing techniques, you can revitalize your kitchen cabinets and create a fresh, updated look. For more inspiration and ideas, check out our article on cabinet painting ideas. Remember, if you need professional assistance with cabinet painting, it’s always a good idea to consult a reputable painting company, such as cabinet painting near me, to ensure the best results.
Choosing the Right Paint or Stain
When it comes to cabinet refinishing, selecting the right paint or stain is crucial to achieving the desired look and durability. There are different options available, each with its own unique characteristics and advantages. In this section, we will explore the types of paint and stains commonly used for cabinet refinishing, as well as the factors to consider when making your selection.
Types of Paint for Cabinet Refinishing
Paint is a popular choice for cabinet refinishing as it offers a wide range of color options and finishes.
Note: Triangle Pro Painting recommends a 1k or 2k Urethane base paint instead of Latex.
Latex can easily peel or chip. Latex is ok for trim but not cabinets. Urethane dries harder and cures faster for better durability.
Here are some common types of paint used:
| Paint Type | Description |
| Latex Paint | This water-based paint is easy to clean, dries quickly, and has low levels of volatile organic compounds (VOCs). It comes in a variety of sheens, such as flat, satin, semi-gloss, and high-gloss. Latex paint is a versatile option suitable for most cabinets. |
| Oil-Based Paint | Oil-based paint provides a durable and smooth finish. It is known for its resistance to wear and tear, making it a great choice for high-traffic areas like kitchens. However, it has a longer drying time and can emit strong odors. Proper ventilation is important when using oil-based paint. |
| Chalk Paint | Chalk paint has gained popularity due to its matte finish and easy application. It adheres well to most surfaces without the need for extensive sanding or priming. Chalk paint is available in various colors and can create a vintage or distressed look. However, it may require a protective topcoat to enhance durability. |
Types of Stains for Cabinet Refinishing
Staining cabinets can enhance the natural beauty of the wood while providing a protective layer. Here are a few types of stains commonly used:
| Stain Type | Description |
| Gel Stain | Gel stains are thicker and easier to control compared to traditional liquid stains. They are ideal for achieving an even color on cabinets with uneven surfaces or grain patterns. Gel stains also offer longer working times, giving you more control over the staining process. |
| Water-Based Stain | Water-based stains are known for their low odor, quick drying time, and ease of cleanup. They come in a variety of colors and can be applied directly to the wood or over a sealer. Water-based stains are less likely to cause grain raising, making them suitable for cabinets with open grains. |
| Oil-Based Stain | Oil-based stains provide rich and deep colors while enhancing the natural beauty of the wood. They penetrate the wood fibers, offering excellent durability and protection. However, they have a longer drying time and emit strong odors. Proper ventilation is necessary when using oil-based stains. |
Factors to Consider in Paint or Stain Selection
When choosing the right paint or stain for your cabinets, several factors should be taken into consideration:
- Cabinet Material: Different materials, such as wood, laminate, or MDF, may require specific types of paint or stains for optimal results. Ensure that the paint or stain you choose is compatible with the material of your cabinets.
- Desired Finish: Consider the final look you want to achieve. Whether it’s a smooth, glossy finish or a distressed, matte appearance, selecting the appropriate paint or stain can help you achieve your desired outcome.
- Durability: Take into account the level of durability you need for your cabinets. Kitchen cabinets, in particular, are subject to moisture, heat, and frequent use. Choose a paint or stain that offers good resistance to these elements for long-lasting results.
- Ease of Application: Consider your comfort level with the application process. Some paints and stains may require more extensive preparation or multiple coats, while others offer quick and easy application.
- Maintenance: Think about the level of maintenance you are willing to undertake to keep your cabinets looking their best. Some finishes may require regular touch-ups or reapplication, while others are more low-maintenance.
By considering these factors, you can make an informed decision when selecting the paint or stain for your cabinet refinishing project. Remember to follow the manufacturer’s instructions and properly prepare the cabinets before applying any paint or stain. If you need inspiration for color choices, check out our article on cabinet painting colors.
Finishing Touches
After completing the cabinet refinishing process, it’s time to add the finishing touches to bring your kitchen transformation to life. This final stage involves reassembling the cabinets, reinstalling the hardware, applying a protective finish, and learning how to maintain the refinished cabinets for long-lasting beauty.
Reassembling Cabinets and Reinstalling Hardware
Once the paint or stain has dried, carefully reassemble the cabinets. Use the labels or markings you made during the disassembly process to ensure everything goes back in its proper place. Take your time to align the cabinet doors and drawers for a seamless look.
After reassembling the cabinets, it’s time to reinstall the hardware. Clean the hardware pieces and replace any worn or damaged ones, if necessary. Ensure that the hardware is securely fastened to the cabinets, using the appropriate screws or other fastening methods.
Applying a Protective Finish
To protect the newly refinished cabinets and extend their lifespan, applying a protective finish is crucial. A protective finish adds an extra layer of durability, making your cabinets resistant to moisture, stains, and daily wear and tear.
There are various options for protective finishes, including polyurethane, lacquer, and varnish. Each type of finish has its own unique properties, so it’s important to choose one that suits your specific needs and preferences. Consider factors such as the level of sheen you desire and the level of protection required for your cabinets.
Before applying the protective finish, ensure that the cabinets are clean and free of any dust or debris. Follow the manufacturer’s instructions for application, including the recommended number of coats and drying times between coats. Allow the finish to cure fully before using the cabinets to ensure optimal durability.
Tips for Maintaining Refinished Cabinets
To keep your refinished cabinets looking their best, it’s important to follow proper maintenance practices. Here are some tips to help you maintain the beauty and longevity of your refinished cabinets:
- Avoid using harsh cleaning agents or abrasive cleaners that can damage the finish. Instead, use a mild soap and water solution or a recommended cabinet cleaner.
- Wipe up spills and splatters promptly to prevent them from penetrating the finish and causing staining or damage.
- Use caution when handling heavy or sharp objects near the cabinets to avoid any accidental scratches or dents.
- Avoid excessive moisture or humidity in the kitchen as it can affect the durability of the finish. Proper ventilation and use of exhaust fans can help control humidity levels.
- Regularly dust the cabinets and clean them with a soft, lint-free cloth to remove any dirt or debris. Avoid using rough materials that can scratch the finish.
- Consider using cabinet liners or pads in areas prone to wear, such as under sinks or in high-traffic areas, to protect the cabinet surfaces.
By following these maintenance tips, you can enjoy your beautifully refinished cabinets for years to come. For more information on kitchen cabinet painting, colors, or to find professionals near you, visit our article on kitchen cabinet painting or explore cabinet painting colors and cabinet painting near me.
Triangle Pro Painting stands out in the world of kitchen cabinet painting, offering a distinctive edge with our use of Urethane base. Our commitment to excellence means that your cabinets not only receive a stunning aesthetic transformation but also benefit from the durability and protection that Urethane provides. Unlike traditional methods, Urethane base ensures a robust and long-lasting finish that withstands daily wear and tear. This sets Triangle Pro Painting apart, promising Raleigh homeowners not just a beautiful kitchen upgrade, but an investment in quality that endures. If you’re looking to elevate your kitchen with cabinets that stand the test of time, contact Triangle Pro Painting. Let us bring our expertise and the unparalleled benefits of Urethane base to your kitchen, ensuring a result that exceeds expectations.


